Introduction
Building your first robot can be an exciting and rewarding experience! Whether you’re a student, hobbyist, or aspiring engineer, learning how to design and assemble a robot from scratch helps you develop essential skills in electronics, programming, and mechanics. In this guide, we’ll walk you through the step-by-step process of building a simple robot, from gathering materials to programming its movements. Let’s get started! 🚀
Step 1: Define Your Robot’s Purpose 🎯
Before you start building, decide what you want your robot to do. Some beginner-friendly robot ideas include:
- A line-following robot 🚦
- A light-seeking robot 💡
- A remote-controlled car 🚗
- An obstacle-avoiding robot 🛑
Choosing a simple function will help you focus on the basics without getting overwhelmed.
Step 2: Gather the Necessary Components 🛠️
To build a basic robot, you’ll need the following components:
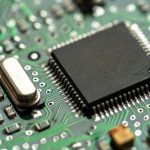
1. Microcontroller (The Brain) 🧠
A microcontroller is the main processing unit of your robot. Popular options include:
- Arduino Uno – Best for beginners, easy to program
- Raspberry Pi – More advanced, supports complex projects
- ESP8266 or ESP32 – Good for Wi-Fi-enabled projects
2. Chassis (The Body) 🏗️
You can buy a robot chassis kit or create one using:
- Plastic sheets
- Metal frames
- 3D-printed parts
3. Motors & Wheels (The Movement) ⚙️
To make your robot move, you need:
- DC Motors – Used for continuous movement
- Servo Motors – For precise movements
- Stepper Motors – Ideal for controlled rotations
4. Power Source (The Energy) 🔋
Your robot needs a power supply, such as:
- Rechargeable Li-ion batteries
- AA or AAA batteries
- A power bank for Raspberry Pi
5. Motor Driver (Control Unit) 🎮
Since microcontrollers can’t provide enough power to drive motors, you need a motor driver like:
- L298N Motor Driver
- L293D Motor Driver
6. Sensors (The Senses) 👀
Depending on your project, you might need:
- Ultrasonic Sensors – For obstacle detection
- Infrared Sensors – For line-following robots
- Light Sensors – To detect brightness
7. Wires and Connectors (The Nervous System) 🔌
Use jumper wires, breadboards, and soldering tools to connect the components.
Step 3: Assemble the Robot 🏗️
1. Attach the Motors and Wheels 🚙
- Fix the motors onto the chassis using screws or glue.
- Attach wheels to the motor shafts.
2. Mount the Microcontroller and Motor Driver 🖥️
- Secure the microcontroller onto the chassis.
- Connect the motor driver to the microcontroller and motors.
3. Connect the Power Supply ⚡
- Attach batteries to the microcontroller and motor driver.
- Make sure you use the correct voltage to avoid damage.
4. Add Sensors and Additional Components 🎛️
- Install sensors in the correct positions.
- Use a breadboard to test connections before finalizing them.
Step 4: Programming Your Robot 👨💻
Now that your robot is assembled, it’s time to program it. Follow these steps:
1. Install Arduino IDE (For Arduino Users) 💾
- Download and install the Arduino IDE from www.arduino.cc.
- Connect the Arduino to your computer via USB.
2. Write Basic Code 📝
Here’s a simple Arduino program to move the robot forward:
cpp
------
void setup() {
  pinMode(9, OUTPUT);  // Left motor
  pinMode(10, OUTPUT); // Right motor
}

void loop() {
  digitalWrite(9, HIGH); // Move left motor forward
  digitalWrite(10, HIGH); // Move right motor forward
  delay(2000); // Move for 2 seconds
  digitalWrite(9, LOW);
  digitalWrite(10, LOW);
  delay(1000); // Stop for 1 second
}
3. Upload the Code 🚀
- Connect your microcontroller.
- Click Upload in the Arduino IDE.
- Your robot should start moving!
Step 5: Testing and Troubleshooting 🔍
Once your robot is programmed, test its functions:
✅ Check if the motors move correctly.
✅ Test the sensors to ensure they respond properly.
✅ Verify all connections are secure.
✅ If the robot doesn’t work, recheck the wiring and code.
Step 6: Improve and Customize 🎨
Once your basic robot is working, experiment with new features:
🔹 Add Bluetooth or Wi-Fi for remote control 📡
🔹 Install a camera for vision-based tasks 📷
🔹 Upgrade the chassis for better stability 🔩
Customization is the key to learning and innovation!
Conclusion 🏁
Building your first robot is an exciting journey that introduces you to electronics, programming, and mechanics. Start with a simple design, experiment, and improve upon your creation. With practice, you can build more advanced robots and even participate in robotics competitions!
Are you ready to bring your first robot to life? Let’s build! 🚀🤖